
In this short guide, I will try to document the following —
- Setting up the translation in React Native
- Use translation react native components/screens.
- Change translation
1. Setting up the language
Create a new project with expo or RN CLI. Once your app is ready, install the necessary packages to set up the translation in your app.
yarn add i18next react-i18next
Then create a `translation folder` inside your src or app directory. Within that folder create a `resources` folder with 3 files, namely `en.js` & `bm.js` (Bahasa Malaysia), and `index.js` file. The folder structure should look like the following,
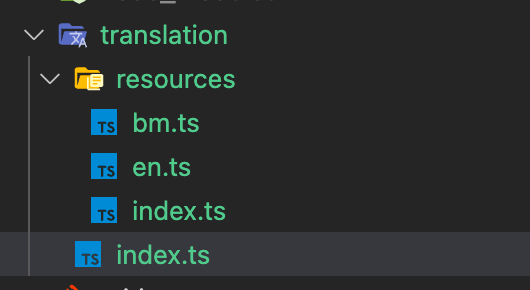
resources/en
export default { welcome: "Welcome",};
resources/bm
export default { welcome: "Selamat Datang",};
resources/index
export { default as en } from "./en";export { default as bm } from "./bm";
Now let’s create another index.ts file inside resources dir where we will do our language setup.
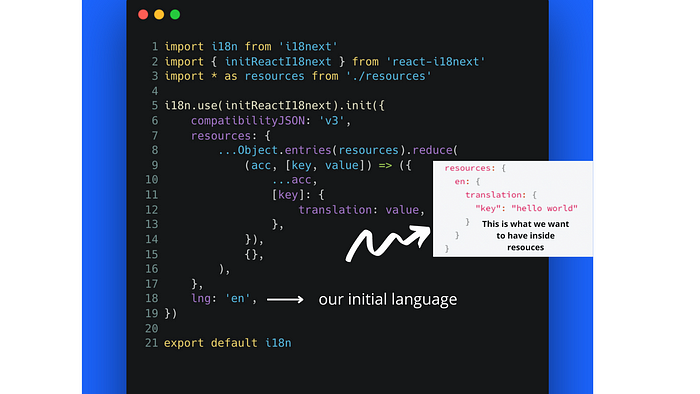
Awesome, our language setup should be done with the above steps. Now we will just need to import the translation file into our root file. Like so,
import './Translations'
2. Use translation
In order to use translation inside our component, we need to import the `useTranslation()` hook from react-i18next. Let’s see an example.

Check line 7 and line 10.
3. Change Language
Now let’s try to change the language. It is super straightforward to change the language, all you need to do is just pass lang code to this following function
i18n.changeLanguage("bm") or i18n.changeLanguage("en")

Here is the full source code, https://github.com/Saad-Bashar/rn-translationTranslationLocalization